Background
NOTE: This is intended for general purpose RPi distros such as RaspBian.
DO NOT DO THIS FOR THE PiGate RPi install
As a new Raspberry Pi 3 owner I found having another monitor, keyboard and mouse to be just a little too much for my limited work-space. It did not take long to find the answer on-line: Virtual Network Computing (VNC). This allows you to access your headless RPi, no monitor etc., from another computer over your home network as if you were sitting in front of the RPi monitor etc.
Other approaches
In the course of researching VNC, I stumbled on two alternatives; X11vnc and Windows Remote Desktop, aka Remote Desktop Protocol (RDP) .
X11VNC
X11VNC ( Link ) is a VNC server that works with almost any VNC client such as the Tight VNC viewer. I will not cover how to install it on your RPi as that is well covered in the link and it functions the same as the Tight VNC server described below.
Windows Remote Desktop Connection (RDP)
RDP ( Link ) works very well and has some advantages over VNC. It is easy to install on the RPi. It does not require any modifications to make it load on boot and for now is my ‘go to’ remote application
*** We will do this entirely headless, the only connection to the RPi will be the mico B USB for power.
SSH (do first)
Secure Shell (SSH) allows you to access the RPi command line remotely. We’ll use SSH to remotely set up VNC. Whatever approach you take you will need SSH functioning.
- Turn on your RPi and determine its ip address
I like to use a Windows program called Advanced IP Scanner ( Link ) it will display all of the IP addresses on your network. Set up the Advanced IP Scanner to scan your range of IP address, something like 192.168.1.0 – 192.168.1.255 0r perhaps 10.0.0.0 – 10.0.0.255. Now look in the results for the address of the RPi. The Manufacturer will be ‘Raspberry Pi Foundation’. Write down the RPi’s IP address. Note: You may want to increase the DHCP lease time so this address does not change.
- Access your RPi via SSH
Install PuTTy ( Link ) on your windows desktop. It is not really an install, just an exacutable file. We will use PuTTy to access the RPi via SSH to set up the VNC.
Start PuTTY and enter the RPi’ ip address in the Host Name field, leave the port on 22, check SSH, click Open
A window will open asking for login as:
The default RPi login is pi and the password is raspberry.
This will give you access to your RPi’s command line: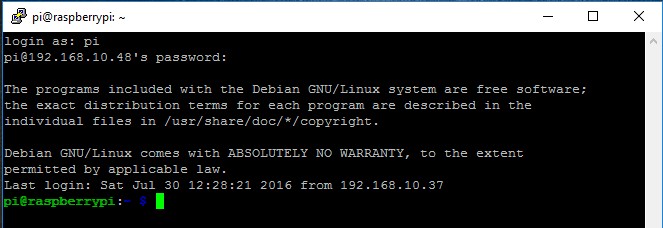
If you save the PuTTY’s SSH configuration you can easily come back to it, so long as the RPi’s IP address hasn’t changed.
Windows Remote Desktop
This is well covered in the linked page above but will go over the steps here so we have should the link go down. RDP may not be available on all Windows platforms. I have found it in Windows 7 Professional and Windows 10 Home.
RDP on the RPi (server)
Login to your RPi via SSH and run the following command:
sudo apt-get install xrdp
That’s it.
XRDP documentation is here: http://www.xrdp.org/
XRDP will load when you restart your RPi without any further changes.
RDP in Windows (client)
You can run RDP by typing Remote in your Window’s search bar.
Type the IP Address of you RPi in the Computer: field
Enter your RPi username and password whan asked (Pi/raspberry)
Wait a few seconds for the screen to be transmitted…………
Your RPi desktop should appear on your Windows desktop!
RDP has a menu accessible by right clicking on the top most bar, the one with the RPi’s URL and Remote Destop connection in it.
A very useful menu choice is “Smart Sizing’.
Tight VNC
If you are not using a Windows computer for your client or just wish to use VNC rather than RDP here is how to do it.
Install / Run the Tight RPi VCN Server
The Server runs on the RPi. It is very small and can be set up to run on boot or you can SSH to the RPi and start the VNC Server just when you want to use it.
This very well documented on the RPi website ( Link )
- Make sure your RPi is up to date. copy and paste the following two commands into the RPi (via SSH):
sudo apt-get updatesudo apt-get dist-upgradeOptional:sudo apt-get autoremove
- Install Tight VNC:
sudo apt-get install tightvncserver
- Run the Tight VNC Server :
tightvncserver :1- Where :1 is the display number. Display #’s are sequentially assigned if not defined in the command line. Display 0 is the one being displayed to the nonexistent HDMI monitor.
- You can set the resolution, color depth by using the following:
tightvncserver :1-geometry 1920x1020 -depth 24
- The first time you start Tight VNC you will be asked to enter and verify a password (8 chars max) that you will use to access the RPi TVNC.
- And a view only password if you want.
- Make note of the VNC Log location, it may come in handy for troubleshooting, if needed.
- When you start Tight VNC in the future you will get some confirmation responses from the RPi.
- Similar to: New ‘X’ desktop is raspberrypi:1
- Note the # (1 in this case) after the “:”. It will be needed as the port for your VNC Client
Install / Run the Tight VNC Client
The Windows Tight VNC Client install is directly from their web site ( Link ). Think it is also available in other OS’.
When you run the client enter the RPi’s IP address followed by the display #.
For example: 192.168.10.48:1
Note the :1 either auto or command line
You’ll be asked for the password, tou entered the first time you started the VNC Server and the RPi desktop should appear in a window in front of you!
How to Reboot the RPi via SSH:
Enter the command: shutdown -r now
Then enter the # for Pi
To Kill the Tight VNC Server
tightvncserver -kill 😡
Where x is the desktop # from above
Run Tight VNC on RPi Boot
More to come. . .